First, I have to give credit to The Efficient Crafter for the idea. She made her box a little differently because she used patterned paper. I used cardstock, so I didn't need as many layers for the box to be strong enough. Also, to make my version you'll only need one 8.5"x11" sheet of Whisper White or Very Vanilla, and a half sheet of 12"x 12" of whatever color you choose for the outside, plus whatever you'd like to embellish with.
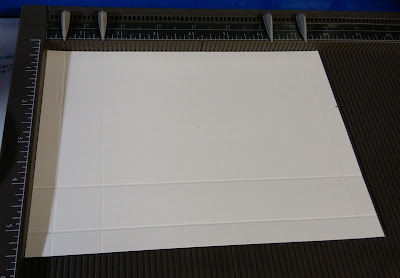
Score your 6"x 12" cardstock at 4 7/8 and 7 1/8. This will form the outside.

To create the two inner pockets, cut a 3/4" strip off of the long side of a sheet of 8.5"x11", then cut the remaining piece in half to get two 7 3/4" by 5 1/2" pieces.

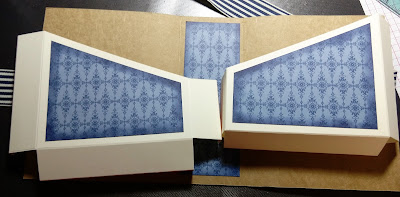
You're going to make a slanted pocket that looks like this from the outside. If you want the pocket to reach the top (it would look tidier), you'll need to cut two pieces that are 7 3/4" x 7" instead, but I thought this way would use less CS and once it's full of cards, it won't matter so much.

Score each inside piece at 1/2" and 1 1/2" in from two short sides and one long side...


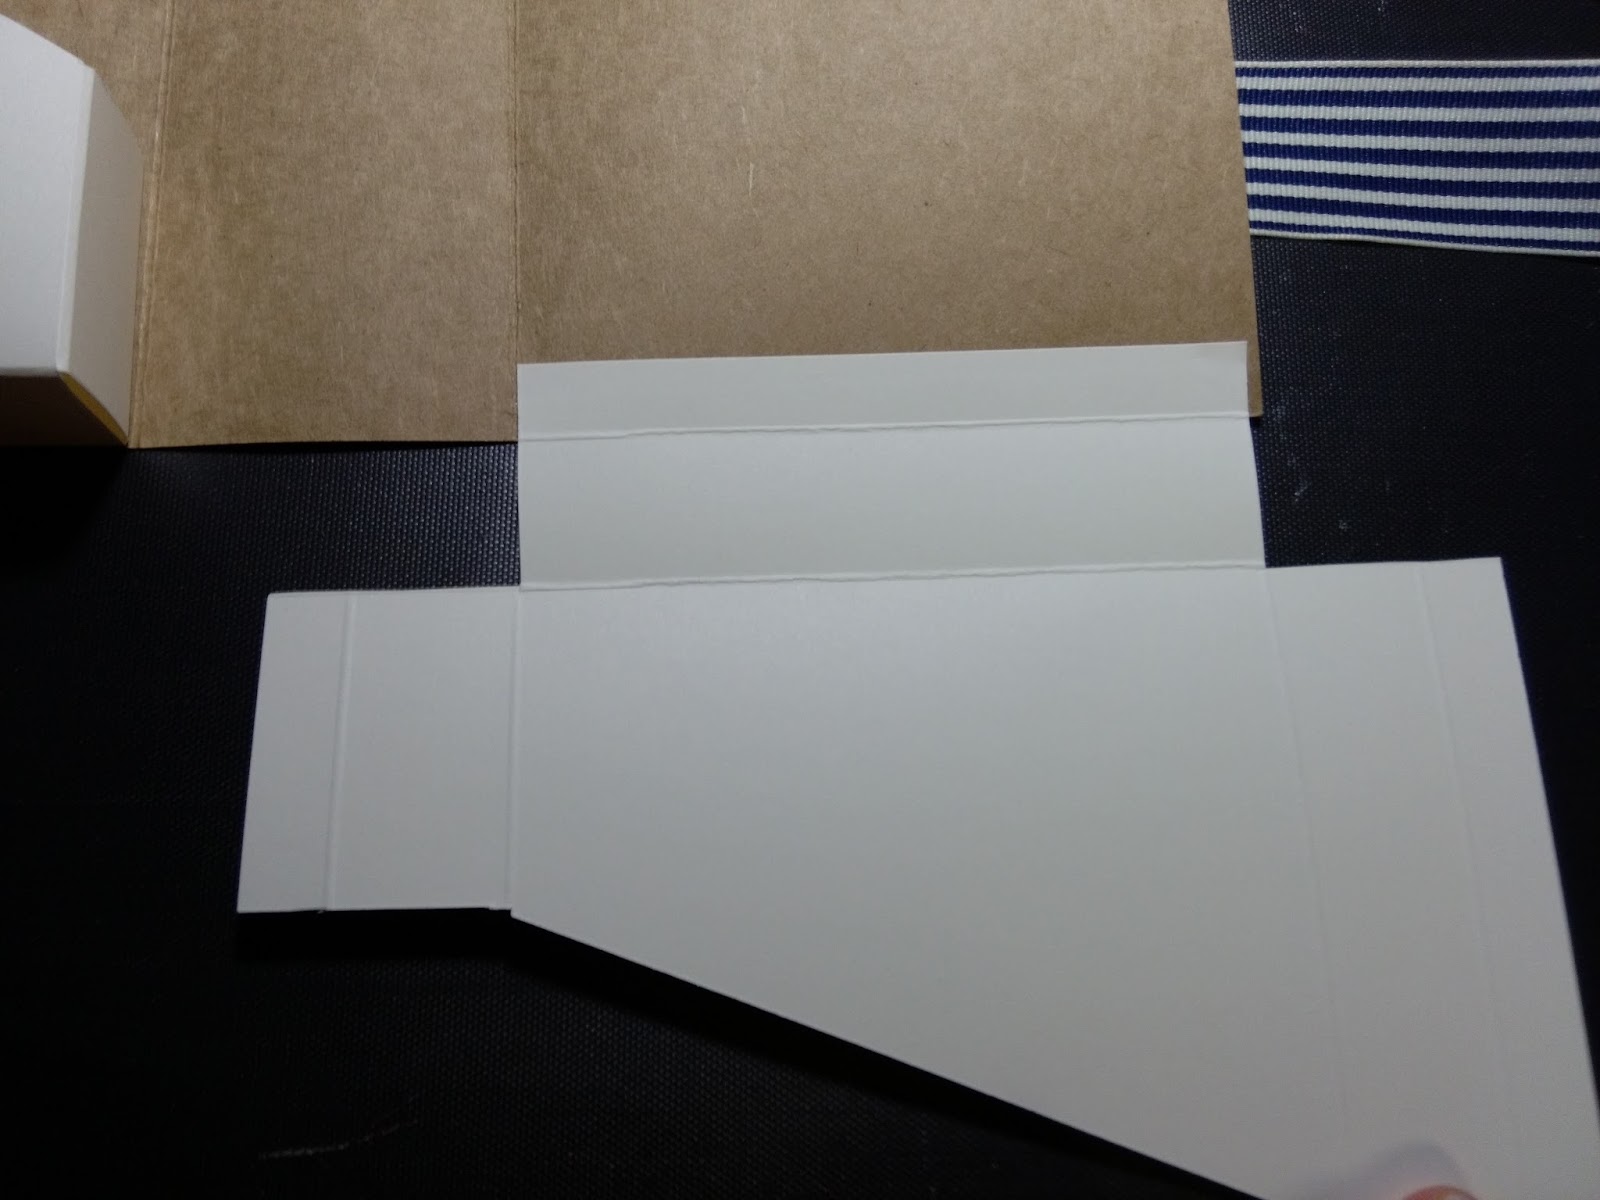
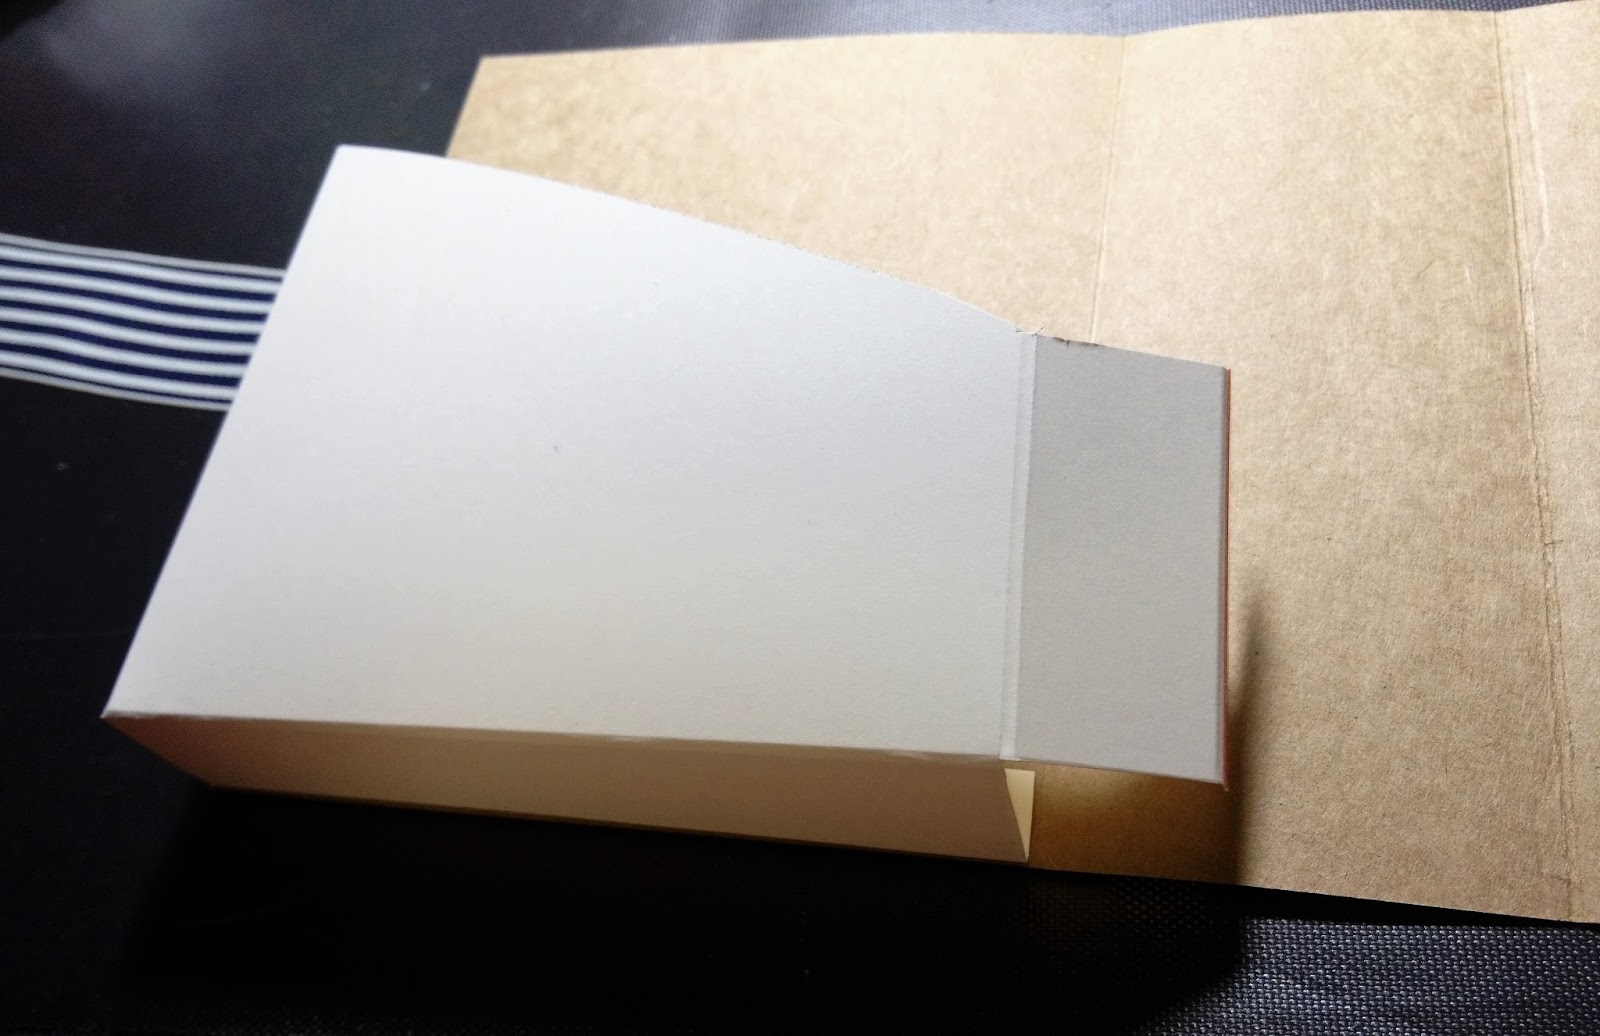
Now comes the tricky bit... cutting the diagonal. Turn your card stock along the cutting line from the top of your 2" flap to the top of the card stock where the next score line is... you can just make out the top one in my photo:

You should end up with something like this:

Red liner tape is a strong adhesive, put it (or something similar) along the inner edge of all the 1/2" tabs, like this:

Decorate the cover and pockets at this stage. Much easier to do before everything is assembled! Also, since the length of ribbon you'll need depends on how wide it is, leave it attached to the spool at one end for now.


Finally, adhere the pocket to the cover; bottom first,


To try and make it look a bit more like a book, I squeezed the covers together to bend a little curve into the spine.


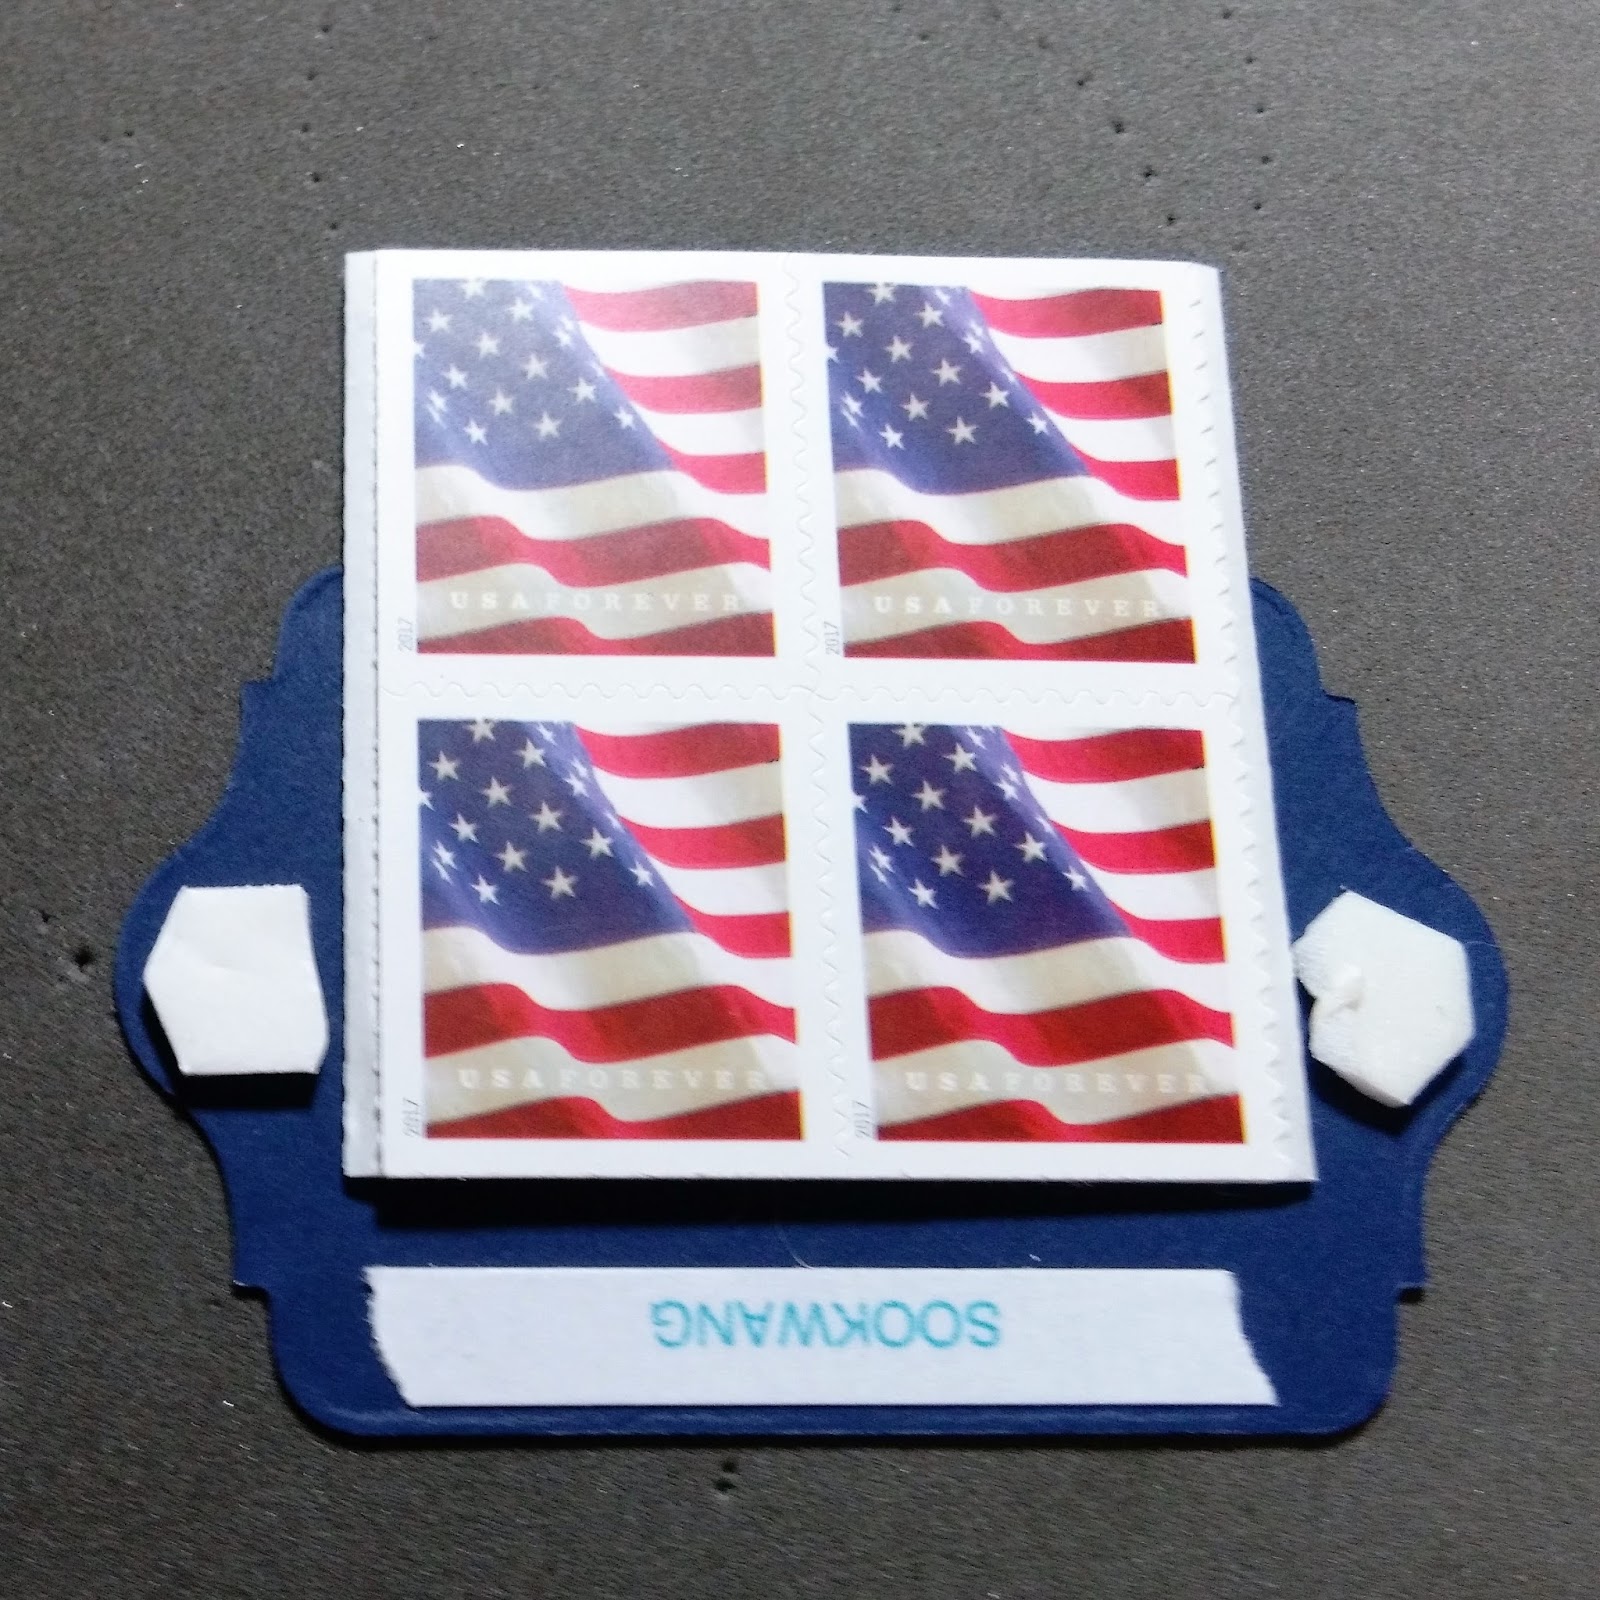
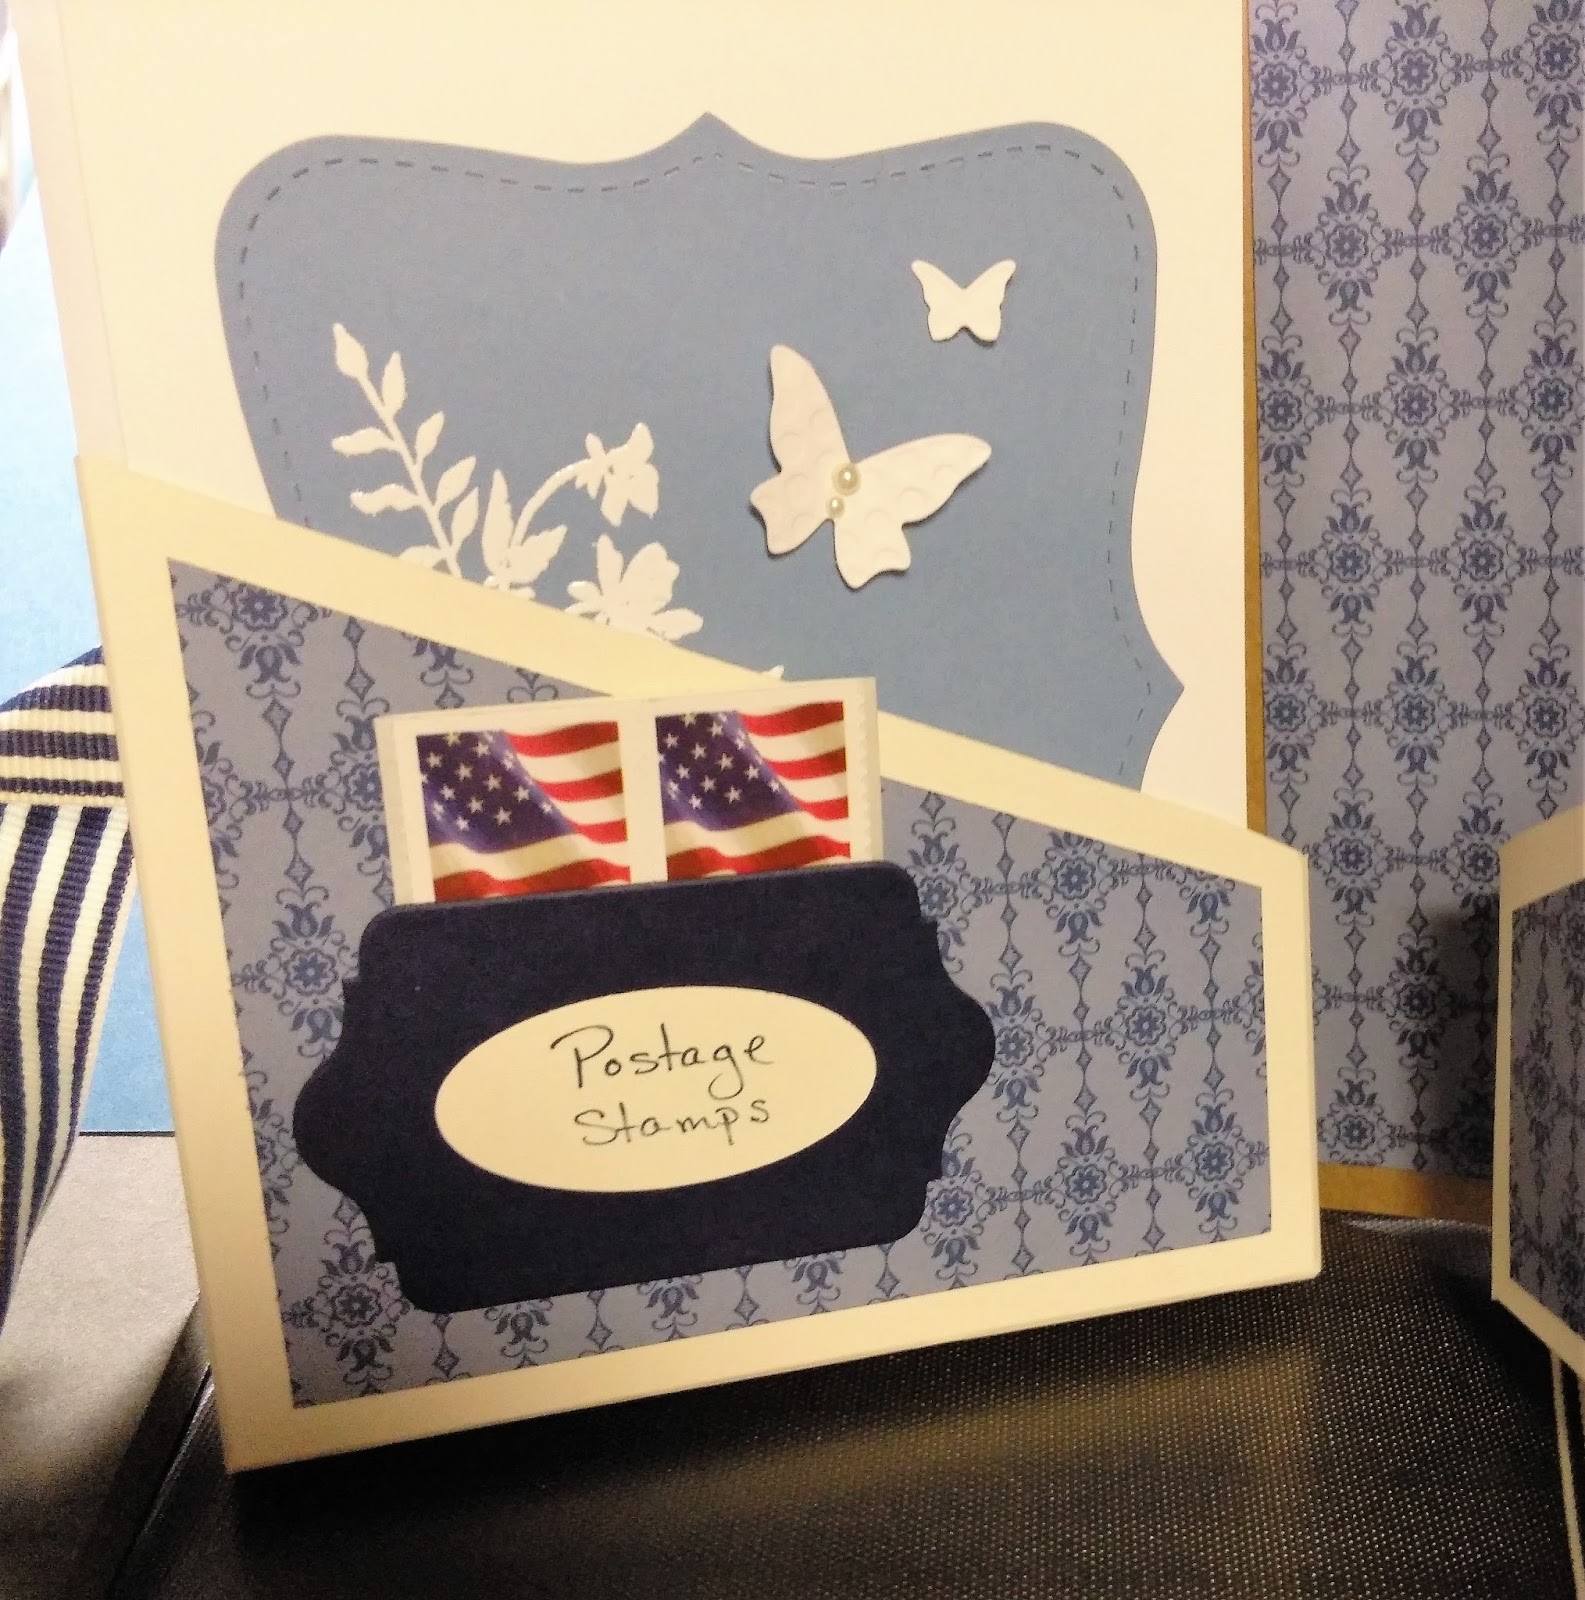
I used a die cut to create another little pocket on the inside that holds a book of postage stamps. Sweet!

For a list of the specific materials used to create this version, click here.
To see this created in a different style, click here.
For a bare-bones printable version of these instructions, click... guess where... HERE!
If you like what you see, please become a Follower. If you don't, please leave constructive comments on what you'd prefer! Thanks for stopping by!
Score your 6"x 12" cardstock at 4 7/8 and 7 1/8. This will form the outside.

To create the two inner pockets, cut a 3/4" strip off of the long side of a sheet of 8.5"x11", then cut the remaining piece in half to get two 7 3/4" by 5 1/2" pieces.

You're going to make a slanted pocket that looks like this from the outside. If you want the pocket to reach the top (it would look tidier), you'll need to cut two pieces that are 7 3/4" x 7" instead, but I thought this way would use less CS and once it's full of cards, it won't matter so much.

Score each inside piece at 1/2" and 1 1/2" in from two short sides and one long side...


Cut away the 1 1/2" squares at the bottom corners.

Measure up two inches from the bottom of one side flap on each piece and mark it. If you're using paper that is the same on both sides, you don't need to worry about making the two pockets mirror images of each other, but I've shown it that way in case you're using a textured or patterned cardstock for yours.

At the 2" mark , make a cut straight across to the second score line.

Now comes the tricky bit... cutting the diagonal. Turn your card stock along the cutting line from the top of your 2" flap to the top of the card stock where the next score line is... you can just make out the top one in my photo:

You should end up with something like this:


(Hint: If you're going to use Fast Fuse or an ATG, then you should wait until you're ready to assemble everything before putting adhesive on the tabs.)
Decorate the cover and pockets at this stage. Much easier to do before everything is assembled! Also, since the length of ribbon you'll need depends on how wide it is, leave it attached to the spool at one end for now.

For this box, I didn't adhere the ribbon, I used Dimensionals to make a channel for it underneath the die cut:

To decorate the pockets, cut a 4 1/4" strip of DSP, then use a ruler parallel to the top edge of the pocket and mark the back where it should be cut.

The paper for inside of the spine measures 2" by 5 3/4"
Now would be a good time to attach another little piece of cardstock to your pockets if you want to create labels or store postage stamps.

To be sure the stamps would fit, I folded them up and put them over the back of the die cut as I attached an adhesive strip to the bottom and one dimensional on each side:
Finally, adhere the pocket to the cover; bottom first,
then long outer edge, then finish with the short inner edge. Remove the covering from just ONE piece of adhesive at a time, and take your time lining up the edges of the pockets and cover before you stick them down forever!
To try and make it look a bit more like a book, I squeezed the covers together to bend a little curve into the spine.

Tie the ribbon into a bow and trim the ends... voila!!

I used a die cut to create another little pocket on the inside that holds a book of postage stamps. Sweet!
For a list of the specific materials used to create this version, click here.
To see this created in a different style, click here.
For a bare-bones printable version of these instructions, click... guess where... HERE!
If you like what you see, please become a Follower. If you don't, please leave constructive comments on what you'd prefer! Thanks for stopping by!
No comments:
Post a Comment